|
WonderSize: 20 x 25 cm
Medium: intaglio on paper Date: November 30th, 2018 |
Exhibition Text
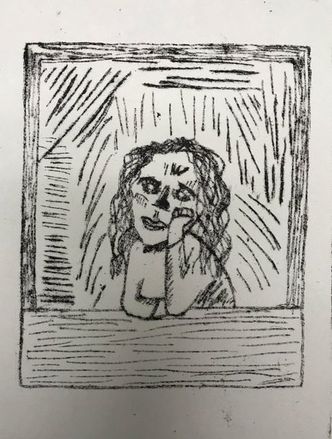
The message that I wanted to convey through my piece "Wonder" was my enjoyment in wondering about all things in the world. I am a very curious person, and I tend to act on all of my curiosities leading me to new experiences, good or bad. None of these experiences would have occurred if I had not wondered about it in the first place. Whether or not the subject concerns me, or if it is bigger or smaller than me, I will always to continue to wonder about all things in life.
Inspiration
|
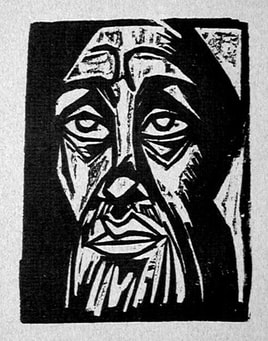
While researching famous pieces of dry point and artists, I came across Herman Max Pechstein; a German expressionist who worked on creating both paintings and dry points. What caught my attention of his piece Kopf / Head was the style used for the figure's eyes and the outline for the nose, I figured that in my piece I wanted the person to be looking up and into the distance, and I used this piece as reference on how to structure the eye placement, although my piece would look into a different direction.
|
|

Unknown by Herman Max Pechstein
|
Kopf / Head by Herman Max Pechstein
Following yet another piece by Pechstein, I incorporated the style of this piece as well. I followed the technique he used for the fingers, as the fingers on my piece would also be seen on one hand. Although I liked the style of the nose from the last piece, I ended up following this piece on how to etch it. I followed the frontal outline of the nose and the horizontal etches alongside it as well as the shading underneath the eyes.
|
Planning Sketches
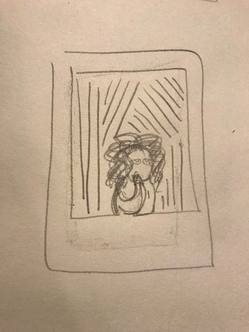
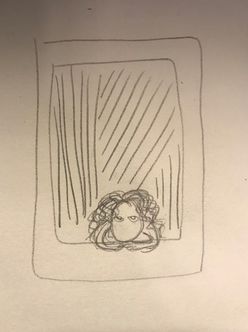
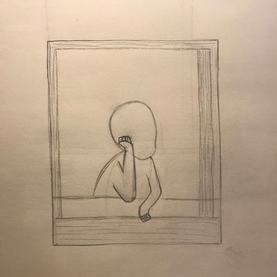
The first sketch was focused on positioning the body. It included the position that I ended up using, with one arm supporting my head and the other tucked under that arm.
|
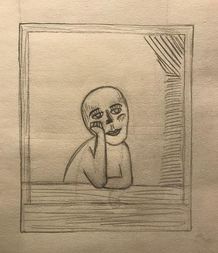
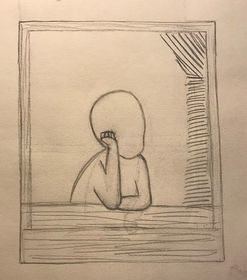
The second sketch included the figure resting forwards resting both elbows on the window sill holding the head up with both hands. This way the piece would have a sense of perfect balance and symmetry.
|
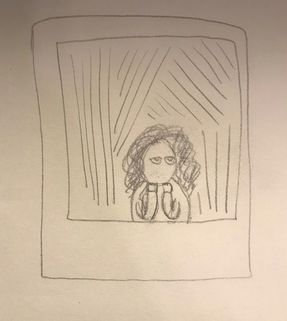
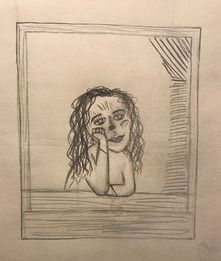
The final sketch also offers the sense of balance and symmetry. However, I changed it to have the figure's head down and resting completely on the hands and the window sill, the head not supported at all.
|
Process
|
To begin, I started with sketching out the outlines for my etchings. I wanted my piece to be a sketching of me looking out of a window, so I drew the outline of the window first. Then was the head, and I shaped it to be more of an upside down pear shape and bigger than anything else in the body, as is normally done in German expressionist dry points. I then sketched the body, slouched back leaning against the windowsill to look away. I sketched the face, inspired by the eyes of the first inspiration piece and the nose from the second. Additional lines were added to exaggerate facial features such as cheek bones or forehead lines.
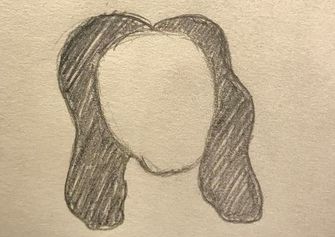
Once the face was completed, I then added the hair. I made sure to include enough to make it seem thicker, yet not too much so I would later be able to follow along individual lines with my sharp tool. Overlapping lines would not be a problem in the future, as all lines would result in the same color black.
After completing the entire body, I began shading in the background. I wanted to create the perspective of the piece to be angled looking towards the right side, so I created horizontal lines along the right side as if the perspective of the image would be able to see the wall inside the window. For the other lines, I placed them to seem as if they were curving around the drawing.
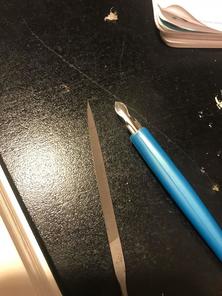
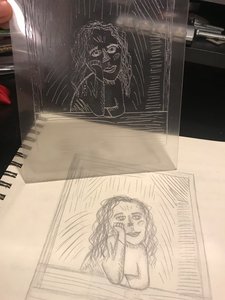
Once the entire sketch was completed, it was time to start scratch it into the plexi glass. Because I never worked on scratching while in class, I never used the classroom materials. However, I was able to use a scratching tool from a scratch art kit and another file-like tool with a very sharp end. I switched between both tools, using the file for lines that would bend more because it was easier to control than the kit tool. Both worked out well.
Placing the glass directly over the sketch, I outlined the corners of the window first so I could easily realign the glass if it lost its place. Some line tracings were more strict than others such as the outlines of the body and face where it was mandatory to keep the original shape. Other lines could be done free handedly with no strict lines because the objective was only to add texture. Some tracings would need to be gone over more than once, however, to ensure the scratches were deep enough to capture the ink.
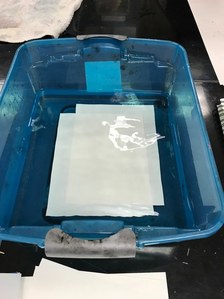
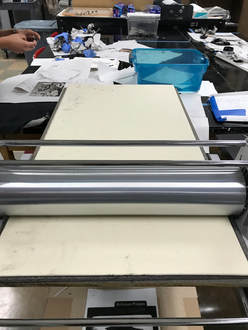
When it was time to begin the process of printing, the first step was to soak the paper in water. The sheet of paper needed to be cut to a small enough size to border the print prior to soaking. Multiple sheets could be soaked at the same time, as long as they are each soaked for approximately 8 minutes. This allows the paper to get to the proper texture to print in the best quality. Once the 8 minutes are up, the sheet may be carefully pulled out and placed on and covered with a towel to dry.
To ink, the plexi glass, squeegees were needed to place and spread the intaglio all across. Less was needed than I originally thought, because it spreads very thinly and goes a long way. However, I had to make sure I added enough intaglio because if not, then it would not seep into the scratches and print successfully. once the entire scratched side was completely colored black, the excess intaglio would need to wipe off. This was done by ripping scrap pieces of newspaper and wiping it off in circular motions until the excess was completely wiped off.
After cleaning the surface of the glass, it was time to roll the print onto the paper. The glass was faced down onto the soaked paper while newspaper was placed over and under it to catch any escaped ink. It was then rolled onto the other side by turning a lever and the print was made.
|
Experimentation
|
|
While drawing the tracing sketch, I experimented with the placement of one of the arms. I originally planned for it to hang over the edge, however I ended up changing the position to the arm being tucked under the other. It provides a more natural and comfortable look along with no longer needing to trace another set of fingers.
|
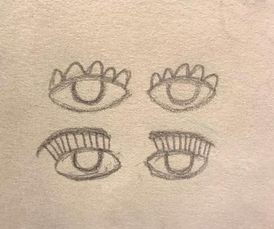
For the eyes, I experimented also with two different styles. The first was to include hill-like eyelashes across the eyelids with no eyebrows, or individual straight lines for the eyelashes connecting to eyebrows. The first ones would provide less work for the carving process and give the image a more whimsical look, while the other would seem more realistic with eyebrows and individual lines for hairs. I concluded that the second idea would best fit the style of the rest of the piece, as most of it includes of mainly straight lines and no circular curves.
|
|
I also had varying ideas on how to interpret the hair. Instead of carving individual strands to give the hair its texture, I had another idea to outline and carve in the entire shape of the hair. As I thought about it, however, it would be difficult to show hair both behind and in front of my shoulders with only one outlined shape. The hair would also lose its texture, and above all; it would be difficult, time consuming and inefficient to carve in the entire shape of the hair.
|


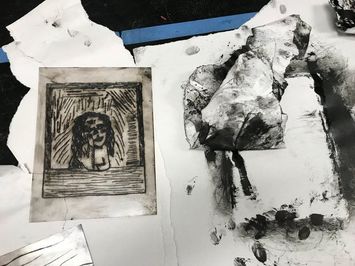
Throughout the process of experimentation, multiple prints were needed to made. The main reason why was not due to the image not being dark enough, but the image maybe having too much ink in the crevices of the glass and smudging out during the printing. the smudges made the image look blurry and any viewer would be confused as to what it is. Others, however, needed to be redone because they were printed too light. The last one included could not be used because I experimented by not removing all the intaglio from the glass completely, and it turned out cloudy and smudged.
Reflection
Overall, this project was not high in difficulty, but I was challenged during the ending process. I have experience with block print from the past, so I understood the concept and process of this project. However, the difficult part were the many trials of printing and reprinting in order to get the perfect print. I began to get frustrated as none of my many prints ended up good enough. I reran through the process of trying to deepen the cuts with a sharp tool once again, but it did not work. The majority of completing the printing process was trial and error, which I learned from each time. The image itself, turned out as I imagined it. However, if I were to improve in the future, I would make the image take up the entire plexi glass space so I would not have trouble worrying about over scratching in small spaces. This occurred in the portions of the eyes, where I did not leave myself enough space and they often printed out too dark. I especially needed more space for the eyes for them to be noticeable as relating to Pechstein's Kopf/Head. His piece includes the clean scratches around the eyes to make them appear as smooth and as circular as possible. This is especially important in the piece because it not only makes the person look decent and recognizable as a person, but it also gives the image character and sets the mood for the piece. I specifically positioned the eyes to be towards the top of the eyelids to look as the image was looking up and relaxed, rather than in the middle and gazing awkwardly at nothing.
ACT Responses
Clearly explain how you are able to identify the cause-effect relationships between your inspiration and its effect upon your artwork:
Both of my pieces of inspiration are very different in terms of style. One is created to look very geometric and square with very minimalist lines, while the other is very intricate with a cartoon style. I followed the more basic parts of my piece such as the eyes and the face lines from Kopf/Head and the more detailed components such as they lips and the hands from the second piece.
What is the overall approach (pov) the author (from research) has regarding the topic of your inspiration?
The point of view had no opinions towards or against any pieces of work from any artist, it was mainly factual.
What kind of generalizations and conclusions have you discovered about people, ideas, cultures, etc. while you researched your inspiration?
I was reminded of how difficult it can be uncovering the reason why an artist created their work with no given context.
What was the central idea or theme around your inspirational research?
The idea was to capture a specific moment in time that the person in the image was feeling at that exact moment, whether it be sadness and conflict or pure content and bliss.
What kind of inferences did you make while reading your research?
Inferences I made while researching was perhaps the artist created their specific work in order to express how they felt at that exact moment in time.
Bibliography
“Browse Art Pictures.” Art Pictures - Artist Kathe Schmidt Kollwitz, www.findartinfo.com/english/0/1/art-pictures/page/1.html.
“Spaightwood Galleries.” Wifredo Lam (Cuban, 1902-1982): Pleni Luna and Others, spaightwoodgalleries.com/Pages/Pages/Exhibitions_German_Exp.html.
“Spaightwood Galleries.” Wifredo Lam (Cuban, 1902-1982): Pleni Luna and Others, spaightwoodgalleries.com/Pages/Pages/Exhibitions_German_Exp.html.
